
Everyone knows that a nice summer shower helps cool the earth and makes you feel much better. But when the summer showers can’t be depended on to bring relief, smart homeowners make their own, and one of the best ways to do this is with a Do-It-Yourself patio mister kit.
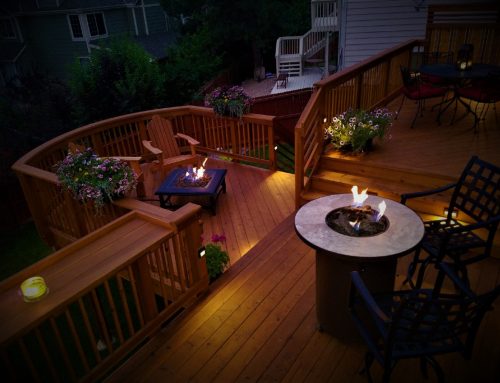
A mister placed in the beams of your pergola or roof cover to your patio can cool that area by as much as twenty-five degrees and leave you comfortable on the hottest of summer days. Just ask Bob Loshbough of Lowe’s Hardware in Littleton.
Bob is a manager in the garden center there, but before that lived in the dry heat of Tuscon, Arizona.
“I grew up in Chicago and never saw misters,” said Bob. “But that’s no wonder. It’s too humid there for a mister to do any good. Here in the west, you can see them in homes and restaurants, all over.” He said that misters generally work the same as swamp coolers do, by creating droplets of water in the air that are so tiny they are only about one tenth the width of a human hair. These droplets rapidly evaporate and take heat with them as they do. At that point the air becomes significantly cooler.
And, misters do not need a lot of water.
“Most kits have a garden hose regulator,” said Bob. “This will bring your water pressure down to about 25psi. Most new homes’ water pressure runs at about 40 to 50 psi, but older homes use a lot more pressure. If your kit doesn’t have a regulator, you can buy one separately for five or six dollars.”
And speaking of dollars, a basic kit for 12 feet of misting starts as low as sixteen dollars. More durable kits of PVC pipe start at around 35 dollars. This is a great, affordable solution for our hot Denver summers.
If you decide to do this project, you’ll want to plan for anywhere from one half hour to two and one half hours to put one up. Most kits will be pretty complete and will have written instructions to go with them.
We asked Bob about any tips or tricks he could recommend to us.
- “Be prepared to clean your heads often,” he said. “About once a month or even more frequently you’ll notice that the heads will stop working intermittently. You don’t have to work until you see one or two heads go out. This will happen to everyone, but especially to those with calcium in their water. When you go outside there’s nothing that needs no maintenance. Just be prepared.” He recommended that when your mister heads clog, you take them down and soak them in vinegar or CLR cleaner, then replace them.
- “If you’re putting a mister in for the first time, I’d really recommend a kit,” he added. “They are generally inexpensive and easy to work with. The PVC kits are much sturdier than the tubing kits, but they’re a little more expensive. I’d suggest you get started with one kit, and then you can find all sorts of replacement parts and additions at any hardware store.”
- Lowe’s also sells PVC pipe cutters if you decide to use that supply for your misting system. These cutters cut down on the work of a hacksaw and make a cleaner cut all around. Then you can purchase a PVC primer and glue kit to make sure of a sturdy fit. “After you prime your PVC on both sides, then you’ll apply the glue to both sides. I generally put the two piece together and give about a quarter turn to make sure everything sticks in place,” said Bob.
- “You don’t want to put your mister more than 10 or 12 feet off the ground,” said Bob. “Higher than that, the water will evaporate where it won’t do you any cooling good.” He also said you wouldn’t want to place your mister less than 8 feet off your deck surface.
If you want to see an installation in action, DeckTec recommends these two quick videos:
https://www.youtube.com/watch?v=zz3mVUG8454
http://www.diynetwork.com/videos/outdoor-misting-system/45083.html
- “Remember the mister won’t work if you have a high humidity day,” said Bob. “They need dry air to be most effective.”
So, what are you doing this weekend? Are you going to complain about the heat or enjoy the outdoors under your DIY misting system?
(Photo by Backyard Breeze)

Leave A Comment